PointOptics is reader supported. We earn an affiliate commission if you buy through our links . Learn More.
The world of rifle scopes and binoculars is an ever-evolving industry. New products are being pushed out constantly, with new technologies and features becoming available. With many people picking up nighttime activities such as hunting and hiking, night vision devices are in constant demand. However, the choice is vast. First, you must decide what you get – whether you want night vision technology or a thermal imaging scope. For hunters, thermal rifle scopes will give you more range and often better features, so this is where you want to be.
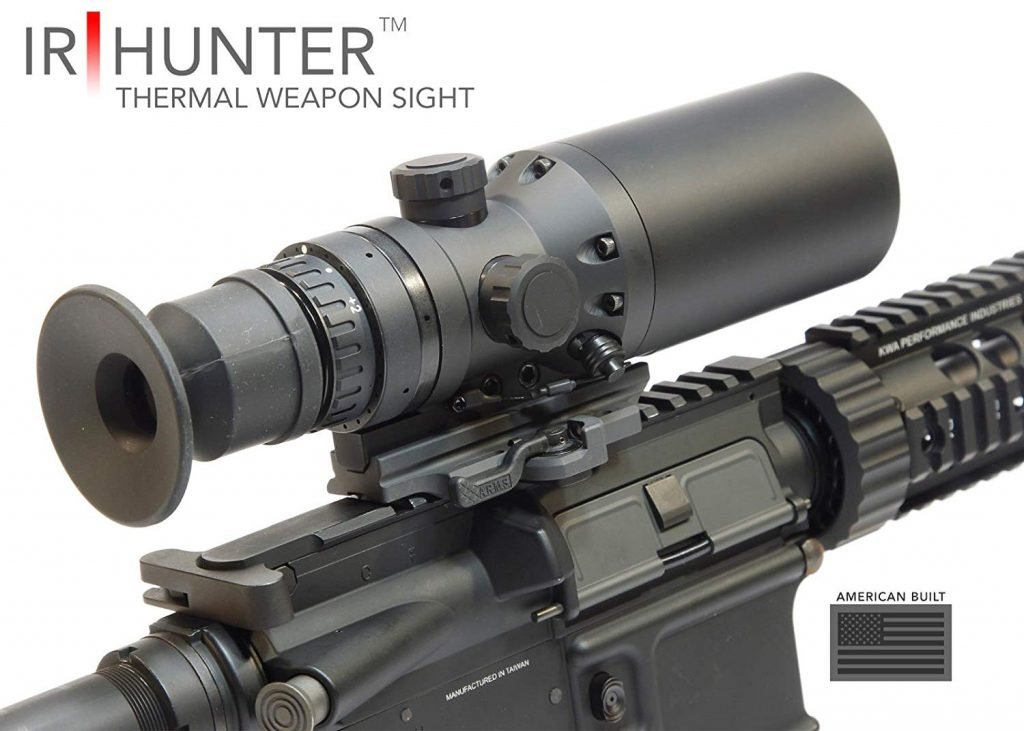

IR Defense IR Hunter Mark II
A high-quality thermal scope. It delivers in all departments, from build quality through to performance.
Even when you want a thermal imaging scope, how do you choose the best one? Many options exist, from brands to sizes, sensors, and prices. If you’re an experienced hunter, you know what to look for and where to invest your money. But what if you’re not? Everything from the worst to the best thermal scope will cost a pretty penny. Spending that much money on a device you aren’t sure about is a big mistake.
For you not to make such a mistake, we’re here to help. Whether you’re an expert who has been hunting for years or someone who’s just getting into it, we have something for you. Below, you will find five of the best thermal scope options today. They’re all made by reputable brands and cost quite a bit. They also offer different qualities and features, so you can choose what works best.
If you still can’t decide or don’t know where to spend your money, we also have a buyer’s guide. If you read through it, you will find information on everything you should know before you purchase, from available technologies to which numbers mean what and some other factors you need to consider. Without wasting any more time, let’s begin with the products.
1. IR Defense IR Hunter Mark II
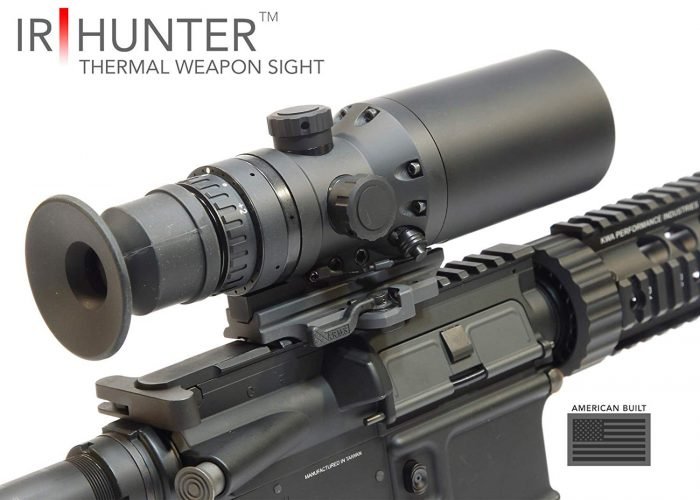
Even though neither of the good thermal scopes you’ll find is cheap, to say the least, some are truly exorbitantly expensive. Even more interesting is that some of them are worth that high price. The IR Defense Hunter Mark II, thermal imaging scope, is one of those thermal scopes. Compared to everything else we’re looking at on our list, it’s an extremely serious thermal imaging scope and a strong contender for the best thermal scope, both on our list and in general. It’s built like a tank, the optics are impeccable, and it has many advanced features that would appeal to serious hunters. Let’s take a look at the details.
The first thing that makes the Hunter extremely good is its Enhanced Target Recognition system. It’s often washed out when you’re looking at a target in front of the sky or the horizon. This is no longer an issue thanks to the ETR, which applies all the sensor’s gain settings on the target. You get a very detailed target image instead.
The 60Hz refresh rate makes things smoother. This is something you will especially notice during movement, whether it’s small or big. If you’re low on battery, you can switch to 30Hz and last longer. To see the target clearly, you can choose three reticle options. The Thermal Combat Reticle, the Thermal Dot Reticle, and the Thermal Subtension Reticle all work extremely well and precisely.
The display on the Hunter is a MILSPEC Emagin OLED display. With a resolution of 640×480 on such a small screen, you can be sure everything is sharp and clear. There’s a video output port if you don’t want to use the built-in screen. You can connect an external display to it and use it for previewing. Inside the thermal imaging, the scope is an uncooled vanadium oxide microbolometer detector lens.
This lets you view a wide variety of targets. However, where it excels are hot and warm objects in absolute, total darkness. With the lens and sensor, there is no need for additional illumination. You will also get a few choices in terms of focus with the Digital Focus Control. There are a couple of options to get ideal focus in various situations.
Moving on to the outside, we mentioned that the scope is built like a tank. The body is made of 6061-T6 aluminum. This is very resistant to corrosion and will also help with shock resistance. There is some, but we wouldn’t advise you to push it regarding water resistance. It’s safe for up to 3 inches of water for 15 minutes. It will survive a splash or a drop in a puddle, but submerging it wouldn’t be the smartest thing to do.
The lens is an anti-reflection lens. Its primary function? To make sure viewing is unobstructed, clear, and sharp. The coating helps transmit infrared light and has been thermally stabilized. That last thing results in high-quality, sharp images you can’t get with any other thermal imaging scope. The 27mm eye relief should be plenty if you’re wearing glasses.
This thermal imaging scope can be mounted on a Picatinny mount, thanks to the LaRue LT681 tactical mount it comes with. It has a quick-release lever to remove it at your convenience. This makes it easy to use as a standalone viewing thermal imaging scope, not just a riflescope. You can carry it in the soft storage case if you’d rather use it like that. Also in the box are two lithium CR-123 batteries you’ll need for operation. At 60Hz, they will last for around 3.5 hours. At 30Hz, that number goes up to about 5 hours.
To wrap things up, the IR Defense Hunter Mark II Thermal Imaging Scope is not for everybody. The first thing that sets it apart is, unfortunately, the price, which is very high. It also doesn’t offer too many smart features. This is something we’ve gotten used to with the other options on our list. Another thing it lacks is the remote control. However, it’s not meant to be used by the masses. It’s meant to be a serious, no-frills scope, and it manages to be the best thermal scope if that’s what you need, without hesitation.
Pros
Cons
2. Pulsar Core RXQ30V
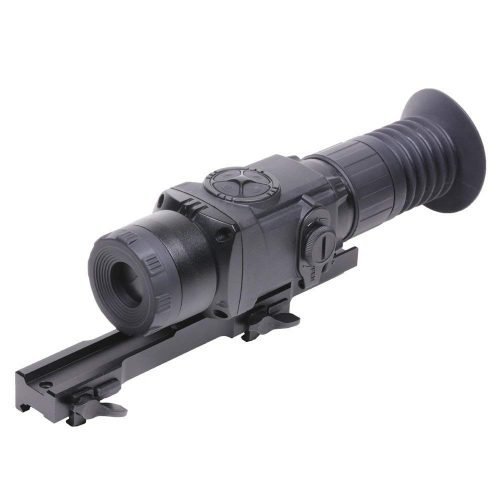
We’ll wrap up the list with another product by Pulsar, this time the Core RXQ30V. As its name implies, this is a budget-oriented thermal imaging scope. Its goal is to give amateurs and people who don’t want to spend too much of a taste of how a thermal imaging scope works. It doesn’t have too many features, nor does it have extremely high-quality optics. However, you couldn’t ask for either of those at the price it sells for. But even at that price, is it worth it regarding thermal scopes? Let’s find out.
The first thing we’ve noticed with the Core is its similarity with the Trail, at least where numbers are mentioned. It also has a 384×288 microbolometer and the same 50Hz refresh rate. You must’ve noticed that the big boys have 60Hz, but 50Hz is sufficient. It is still a huge step up from the 30Hz of some of the competition. The detection range is also the same, at 985 yards – just like the Trail. The difference is the magnification range. The Trail came in a couple of configurations. The Core is offered in one – 1.6-6.4 times. This isn’t a huge downside, though. It’s still a good option.
The low range is almost as wide as your naked eye, and 6.4 times does get fairly close. Anything more than that, and the sensor would struggle, so it’s a good thing they stopped there where the differences with the Trail end are the smart features. Even though a wireless remote is included, it’s just for the basics. You won’t find video, sound recording, or the StreamVision app compatibility. However, with the price difference, this is to be expected.
The Core has a 2x or 4x stepped digital zoom. This option is less preferred, and we would’ve loved the smooth zoom. While we’re at the zoom, it also has a picture-in-picture digital zoom, which is handy. The green sapphire display is effortless on the eyes. It lets you use the thermal imaging scope for extended periods of time without any eye fatigue. You can choose between three rifle profiles with three zero saves. Even though not much, it might come in handy if you have more than one weapon. There’s also one-shot zeroing with a freeze function. If you do need to zero the scope, it’ll be effortless.
The thermal imaging scope is mounted with a quick detach mount. This lets you easily put it on or off your weapon and use it as a handheld scope. The box also has a hand strap to make that a bit easier. The carrying case might also be useful if you’d rather use it handheld continuously.
To wrap things up, the Pulsar Core RXQ30V is an interesting proposition. It’s much cheaper than its competition yet gives you all the basics. However, it lacks any advanced functionality. This makes it a no-go for many shoppers, regardless of whether they’re buying their first scope. If you don’t mind not having all that advanced functionality and would rather save some money, this might be the best thermal scope for budget-oriented users.
Pros
Cons
3. Pulsar Trail XQ
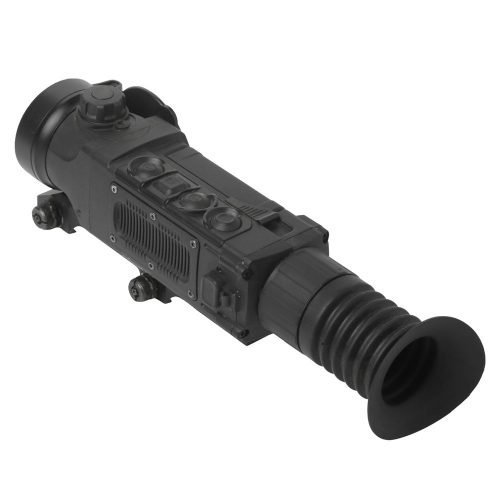
Just like ATN, Pulsar is another household name in the optics game. They have quite a few products, and all are good. That means the Pulsar Trail XQ has some big shoes to fill. From our experience, we’ve found that it does manage that successfully and then some. It comes in a couple of configurations, but the one we’ll look at today is the 2.7 option, which has a 2.7-10.8×42 magnification.
It is the most popular option, and you’ll love it. With a decent resolution sensor and a couple of smart features to make things easier and better, this could be one of the best thermal scope options you could go for. Let’s look and see how it fares when pitted against some of the other thermal scopes on our list.
To begin with, we have a magnification factor. From 2.7x to 10.8x, it gives you a lot of versatility. From a fairly wide field of view to getting in extremely close, it’s just a matter of choosing. The field of view is 7.5 degrees. A very impressive detection range of 1970 yards lets you engage targets without even getting close to being seen or heard. You’ll get that and more if you’re after fluid imaging and a field of view with plenty of contrast.
Thanks to the ‘white hot’ and ‘black hot’ modes and the smooth 50Hz refresh rate, what you’re looking at through the Trail XQ will be clear and sharp. There are 13 variable electronic reticles for you to choose from. The sensor has a 384×288 resolution with a pixel pitch of 17µm. You’ll get the image displayed on an AMOLED display with a resolution of 640×480.
Moving on to the smart features, there are plenty here. To begin with, we have magnification. You can either go for a 2x step-up magnification or a smooth, graduated one if you’d rather customize your field of view. While at the zoom, we must mention the Picture in Picture mode. This gives you a magnified image of the area where your reticle is at the top of the display. Don’t worry about this obstructing the field of view. It only takes up 1/10th of the display.
A built-in accelerometer and gyroscope accurately determine cant and angles larger than 5 degrees. When you combine this with the stadiametric rangefinder feature, you get an accurate measurement of your target, thus eliminating any guesswork on your end. You can save up to 3 rifle profiles with 5 zero saves. When changing a weapon, you won’t have to zero the thermal imaging scope.
The Trail XQ’s highlight smart feature is undoubtedly the StreamVision Wi-Fi feature. You can link the device via Wi-Fi with an Android or iOS device with the free StreamVision app installed. This lets you get real-time footage or remotely operate the device with your smartphone.
If you’d rather not use the phone as a remote, though, there’s an ergonomic remote control. This lets you operate about any feature without touching the thermal imaging scope. We didn’t see the ATN, which has similar options, the capability of streaming the footage to YouTube. The app also allows for firmware updates to the device, which add new functions and capabilities.
Wrapping things up with the build quality, you have an IPX7 water resistance rating. According to the IP rating chart, this lets you submerge the device in 1m of water. We wouldn’t test that out with a device this expensive, though. It’s built well, and the buttons are placed conveniently, so you don’t have to hunt for them.
The Trail XQ is a strong competitor to the ATN thermal imaging scope we discussed earlier. Some features are better, while others are worse, but it’s overall an excellent scope. You can’t go wrong with it, from good build quality and optics to stellar performance and a host of smart features. It’s one of the best thermal scopes we’ve ever reviewed!
Pros
Cons
Buyer’s Guide
We couldn’t blame you if the list above left you with a few questions. Maybe you aren’t an expert in thermal scopes and don’t know what all those technical terms mean. Or maybe you want a good explanation of what everything is. A good thermal imaging scope costs a pretty penny, and you want to know you’re investing your money where you should be.
Below, as promised, is our buyers’ guide. In it, we’ll do our best to explain the terms that might not be clear. We’ll explain what the numbers mean and what technologies you should pay a bit more for. Once you’re done with reading, you should have a good idea of which one of the thermal scopes above you should order. Let’s begin.
Knowing the difference between night vision and thermal imaging
Even though they often serve the same purpose, a night vision device differs greatly from a thermal imaging scope. Thermal optics aren’t cameras. But instead, they’re just thermal imagers. They were first developed and used by the military, but now they’re also used for fun and hunting. The main motive was to help with seeing seemingly invisible things. We have thermal imagers because animals emanate infrared energy, which comes out as heat. The heat signature is thermal energy, which was the guiding factor.
You need a special lens to focus on the thermal energy being emitted. The infrared detector’s phased array of elements then scans the focused energy. These elements give you an (oftentimes highly) detailed pattern of temperature. The pattern is known as a thermogram. Even though this might sound like a lengthy process, it happens in a fraction of a second. Once the thermogram is created, the thermal imaging scope translates it into various electric impulses. Then, those impulses are sent to a signal processing unit and translated into data for display.
The data is then displayed on your screen, appearing in various colors on the scope. Depending on the intensity of the infrared’s emission, the colors vary. The image you get is made from all the impulses the scope receives from the field of view.
The main difference between this and night vision is that the tech requires some light source. It amplifies it so you can see objects like you would during daylight. The moon and stars often have enough light, but some incorporate an IR illuminator for a bit more light. The difference in technology means that a night vision device might give you a more detailed, natural image. However, the image intensifier tubes inside can be damaged if exposed to bright light. Last, a thermal imaging scope can give you a better idea of what you’re looking at if it’s completely dark.
Determine your budget
Your budget is the first guiding factor when you need a thermal imaging scope. None of the scopes come cheap, but how much you want to invest is important. The basic principle is that a more expensive scope has more features and better optics. However, you won’t always use all those features. For example, the Hunter above has high-end features, but many people prefer Bluetooth and Wi-Fi instead in this day and age.
As soon as you have a good idea of how much you can afford to spend, it’s time to start searching—one thing to keep in mind, though. If you want to get good features and stellar optics, don’t settle for a budget-oriented option. Also, chances are you won’t be buying a second one anytime soon. Try to invest a bit more money the first time around and get the best thermal scope you can afford.
What do you need thermal rifle scopes for?
Another important factor is the usage scenario. The main purpose of thermal imaging scopes is often military scenarios or maybe law enforcement. However, in recent years, there’s been a rapid rise in hunters who buy such devices. We aren’t talking amateurs and people who just picked up a rifle. We’re talking about professionals who know what they’re doing. Even they have to start somewhere.
Night vision and thermal imaging aren’t that simple, and making mistakes is quite possible. Therefore, you’ll want to know what you’ll be using your scope for. If you only use it for keeping your backyard clean of small animals, you could do it with a cheaper one with less magnification. You’ll want more magnification and detection range if you use it for hunting in the mountains or forests. Short hunting trips? Battery life isn’t that important. But if you’re pulling all-nighters, you’ll want at least a few hours of battery life.
Uncooled thermal imaging or cryogenically cooled systems?
You’ll find two main thermal imaging scope systems in today’s market. They’re both excellent in their way. Whichever you go for, you can’t go wrong. However, understanding them is important to know which suits you better.
The first type is uncooled thermal imaging. This is what is commonly used with thermal scopes around the world today. It is popular because all the required elements to detect infrared energy can operate at the standard temperature. Therefore, you don’t have to worry about keeping the elements below 32 degrees. Because it doesn’t require anything extra, the process is fairly quiet. This makes the scopes ideal for hunters, which is why many of them prefer an uncooled thermal imaging scope. The downside is that the readings are often different and less sensitive than other systems. They are, however, cheaper than the other option.
The other option is cryogenically cooled systems. Compared to the uncooled ones, they cost a lot more. They use perfectly sealed internals and are mechanically kept to a freezing temperature or below. If you’re near one, you can hear that they’re loud. Their advantage is that the temperature they’re kept in makes them much more sensitive. They’ll give you a much more accurate temperature reading regardless of the conditions you’re using them in. This might be a better option if you can afford one and don’t mind a bit of noise.
Consider the battery life and type.
Thermal scopes require batteries to run the display and all the electronics inside. More powerful magnification factors and more features need more power and, consequently, a larger battery. However, not all manufacturers put larger batteries. This often results in subpar battery life with many scopes.
Your deciding factor will be how much time you spend out during the night. For example, if you’re only going to be hunting for an hour or two, something that has guaranteed three hours of battery life will suffice. On the other hand, if you think you’ll go out in the evening and not come back before dawn, you’ll want much more. A scope that gives you 8 to 10 hours is ideal but hard to find, especially with smart features and high refresh rates.
There’s a solution for this as well – carry extra batteries. For example, if you have an Armasight thermal scope, you could get their extended battery pack, which should give you a few more hours. Or, you could see what kind of batteries the scope uses. They’re commonly AA, AAA, or CR-123, and they all fit in your backpack or pouch. Carrying a few spares with you is never a bad idea.
Magnification and range are important factors regarding overall image quality.
With binoculars, for example, you have two numbers – 8-10×42. The first set, 8-10x, indicates the magnification factor, while the second one, 42, tells you the objective lens diameter. You still have a magnification factor with thermal scopes, but the objective lens diameter isn’t that important and is often left out. Instead, you have the sensor resolution.
Back to our original point, the magnification factor tells you how close you can get to your subject. With a 1x magnification, you’ll seem like you would with your naked eye. With an 8x magnification, however, the target object is eight times bigger. This can be very helpful when you want to get close to your target without physically approaching it. You don’t always want that magnification, though, so most of the scopes on our list have variable magnification. Depending on the situation, you can choose between several magnification powers. A smaller magnification number is sufficient if you only need the scope for your backyard. For longer distances and outdoor hunting, you’ll want more.
The range is the other important number here. That’s what tells you how far you can see objects, which is the maximal useful range for a thermal scope. There are three types to remember here. Detection range is the range at which the scope can distinguish an object from the background. Recognition range is where you can classify the object, whether it’s a person, animal, or vehicle. Lastly, the identification range is where you can see details regarding the object. The detection range isn’t too important when hunting, but you’ll need the recognition range to ensure it’s an animal and the detection range to see what kind and other details.
The refresh rate can be much more relevant than you’d think.
The refresh rate is a very important factor when you’re choosing a computer monitor. It’s even more important here since your eyes will be stuck close to the thermal scope’s display. The refresh rate dictates how many times per second the image on display will refresh. The more times it does, the clearer and lifelike image you’ll get.
There are two or three main options. The first one, which you’ll find in many budget-oriented thermal scopes, is 30Hz. This might be sufficient when you have a stationary target, but you’ll want more for anything moving. The next step up is 50Hz, with 60Hz being the common refresh rate for higher-end scopes. The difference can be astounding and even more emphasized when you’re stuck to the screen. Therefore, for optimal performance, look for 50 or 60Hz.
The sensor’s resolution can make or break your whole experience
Like any other imaging device, the resolution is the number of pixels a sensor can capture. Unlike mechanical scopes, which rely on optics, thermal scopes rely on technology. With more pixels, you’ll get a crisper, sharper image with more detail.
Since thermal imaging won’t quite give you the detail you would get from a night vision device, the higher the resolution, the better the performance. You will often see the sensor’s resolution mentioned in the scope’s name, so look for a higher number. But be prepared to pay a bit more for that pleasure.
Lastly, consider build quality, mounting options, and water resistance.
A thermal imaging scope is something that’s built for the outdoors. There’s a big chance you will smash it against something or drop it at some point. It will also get thrown in your backpack or weapon-carrying case fairly often, so you’ll want one built well. Some shock-absorbing materials, such as a rubberized body, could do, but a full metal build is best. Note that unlike mechanical scopes, which only have optics, thermal scopes have many sensitive electronics inside that could get easily damaged.
Next, you’ll want a way to mount the scope to your weapon. The common solutions are a Weaver or a Picatinny rail mount, which you’ll find on your weapon. With higher-end scopes, you might even find a quick-release system. Just don’t get a quick-release system on a cheap scope. Chances are it will get loose quickly and be more of a problem than a convenience. Another thing to know is that a quickly removable scope means you could use it as a handheld scope if necessary.
The third thing is water resistance. You also have a fog issue with mechanical scopes, but since this is all electronics inside, that’s not a problem. However, a drop of water can easily damage all those electronics. Therefore, look for something that has a good IP rating. IPX7 or IPX8 is sufficient, but anything less than that might be an issue. It’s an outdoor device, so there’s a chance you might drop it in a puddle of water. Better be safe than sorry.
Wrapping things up
As you saw above, choosing the best thermal scope for your needs isn’t such an easy task. First, it’s a lot of money, so any mistake will be costly. Next, you have many factors, from build quality to numbers and sensor resolution. You will want a lot of things to work well for you.
However, at the end of the day, it’s not unlike buying another thing you’ll use often. Consider your budget and your usage scenarios. Then, see where you’re willing to compromise, if necessary. We hope to have explained everything above – all that’s left is to order the best thermal imaging scope that fits your needs!


IR Defense IR Hunter Mark II
A high-quality thermal scope. It delivers in all departments, from build quality through to performance.
